
Assembly Instructions


Congratulations on receiving The Industrial. Follow the instructions below for a quick and easy assembly to get your PC up and running!
Case Orientations
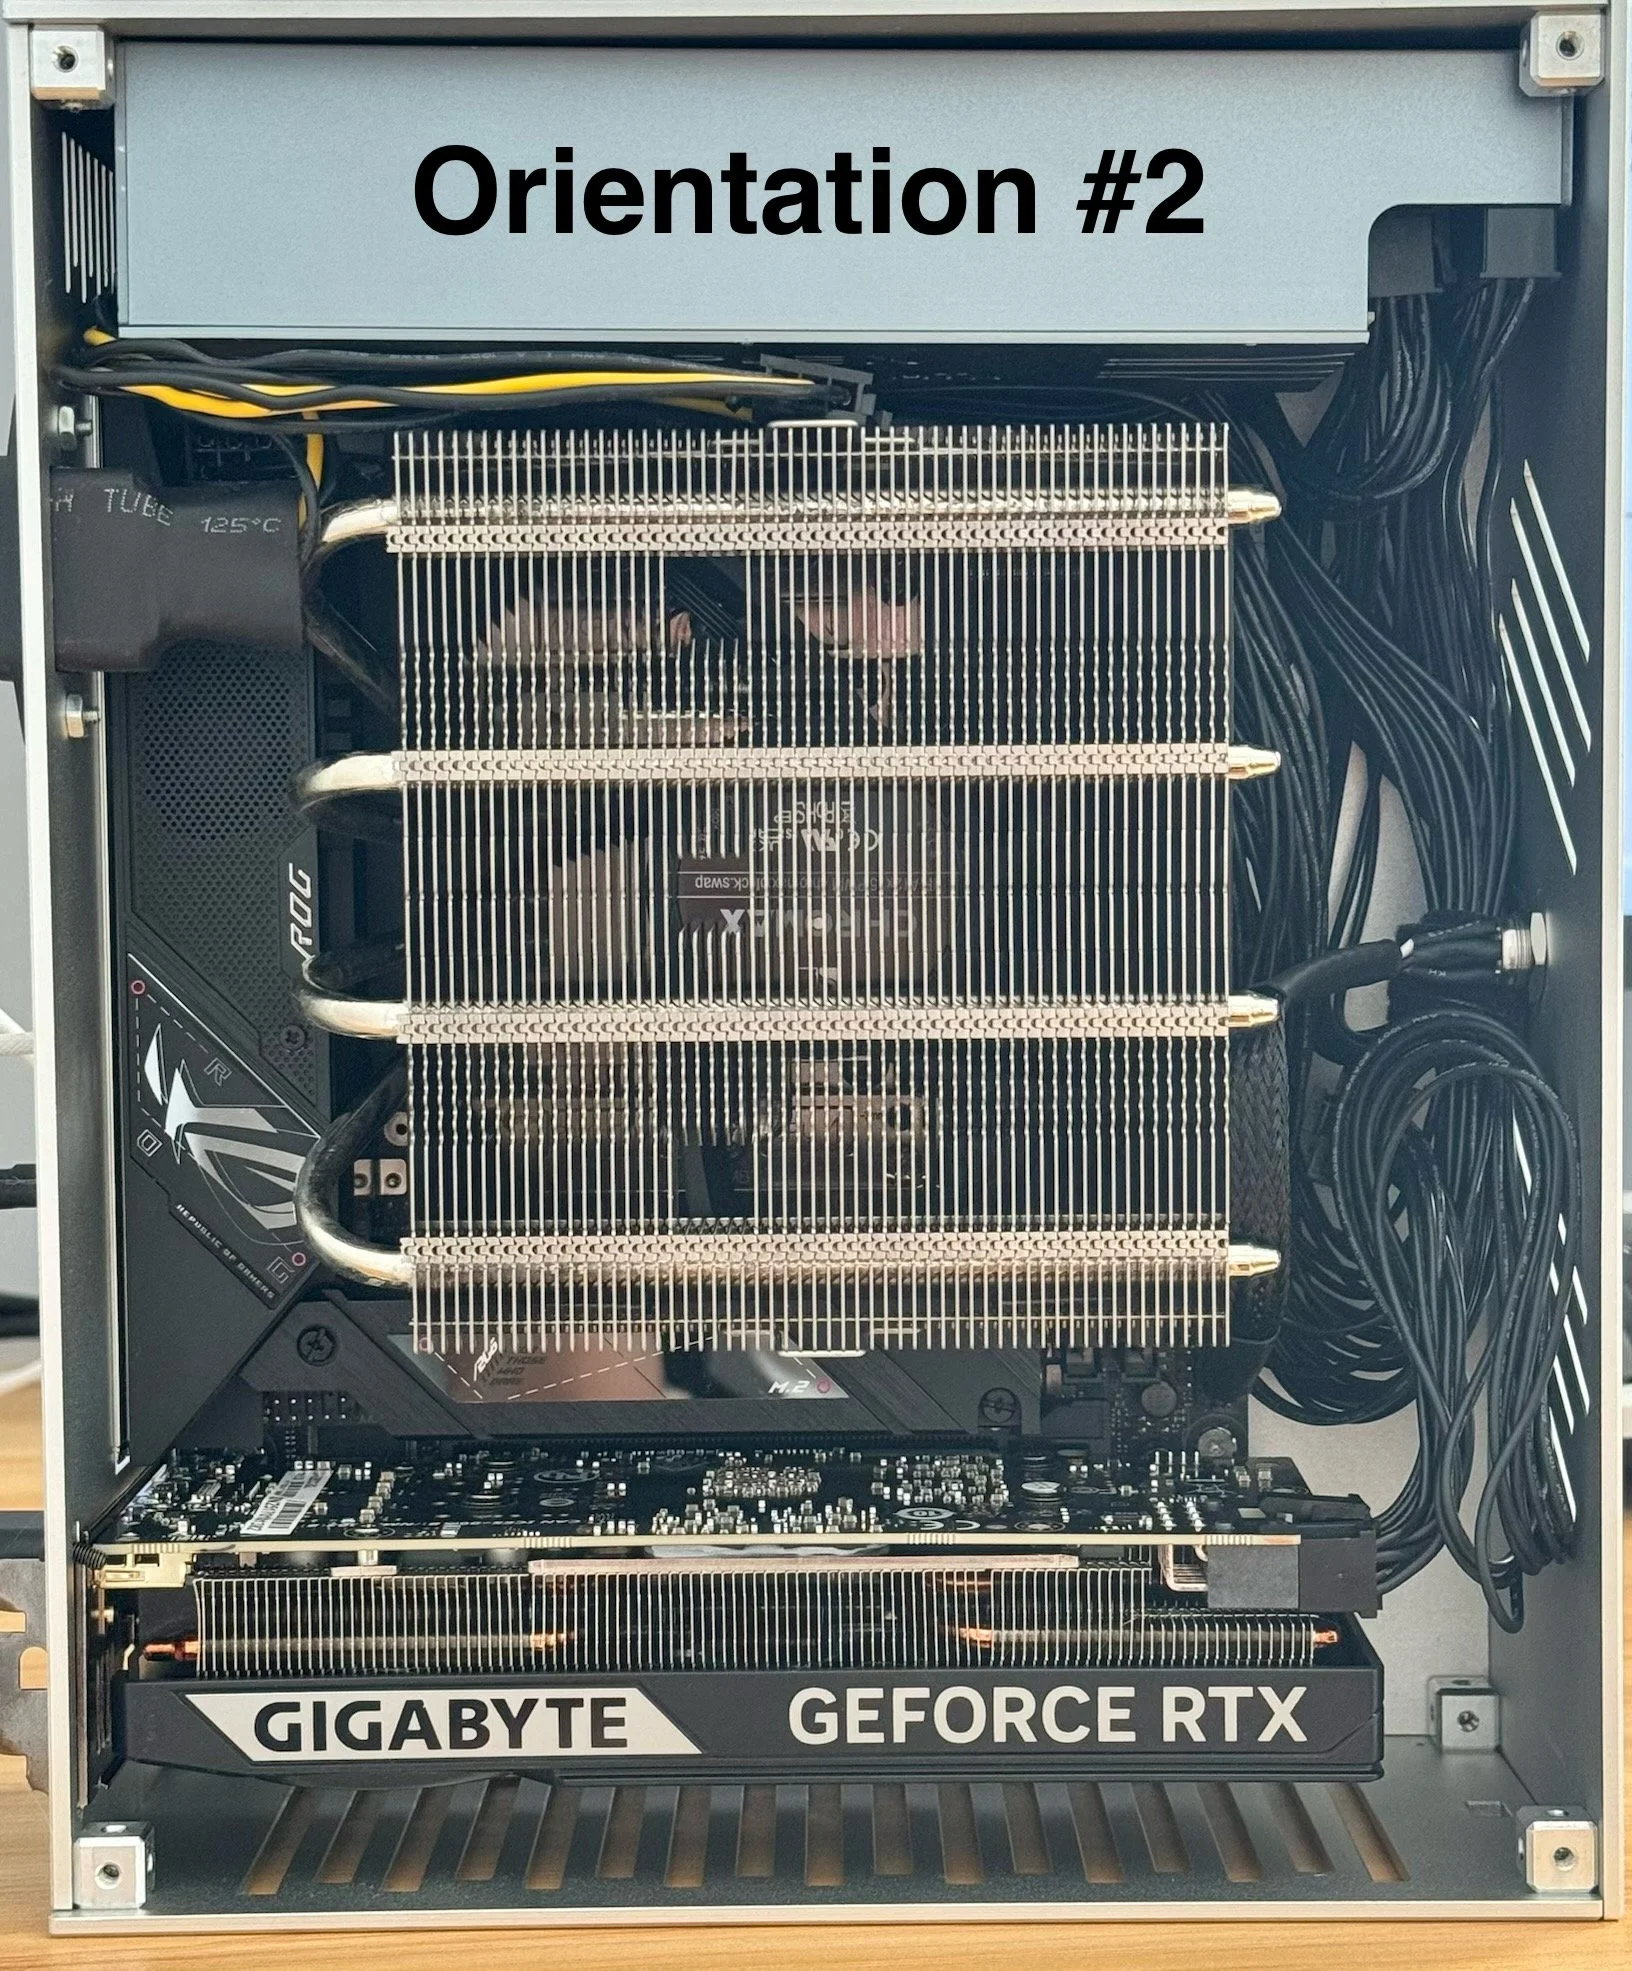
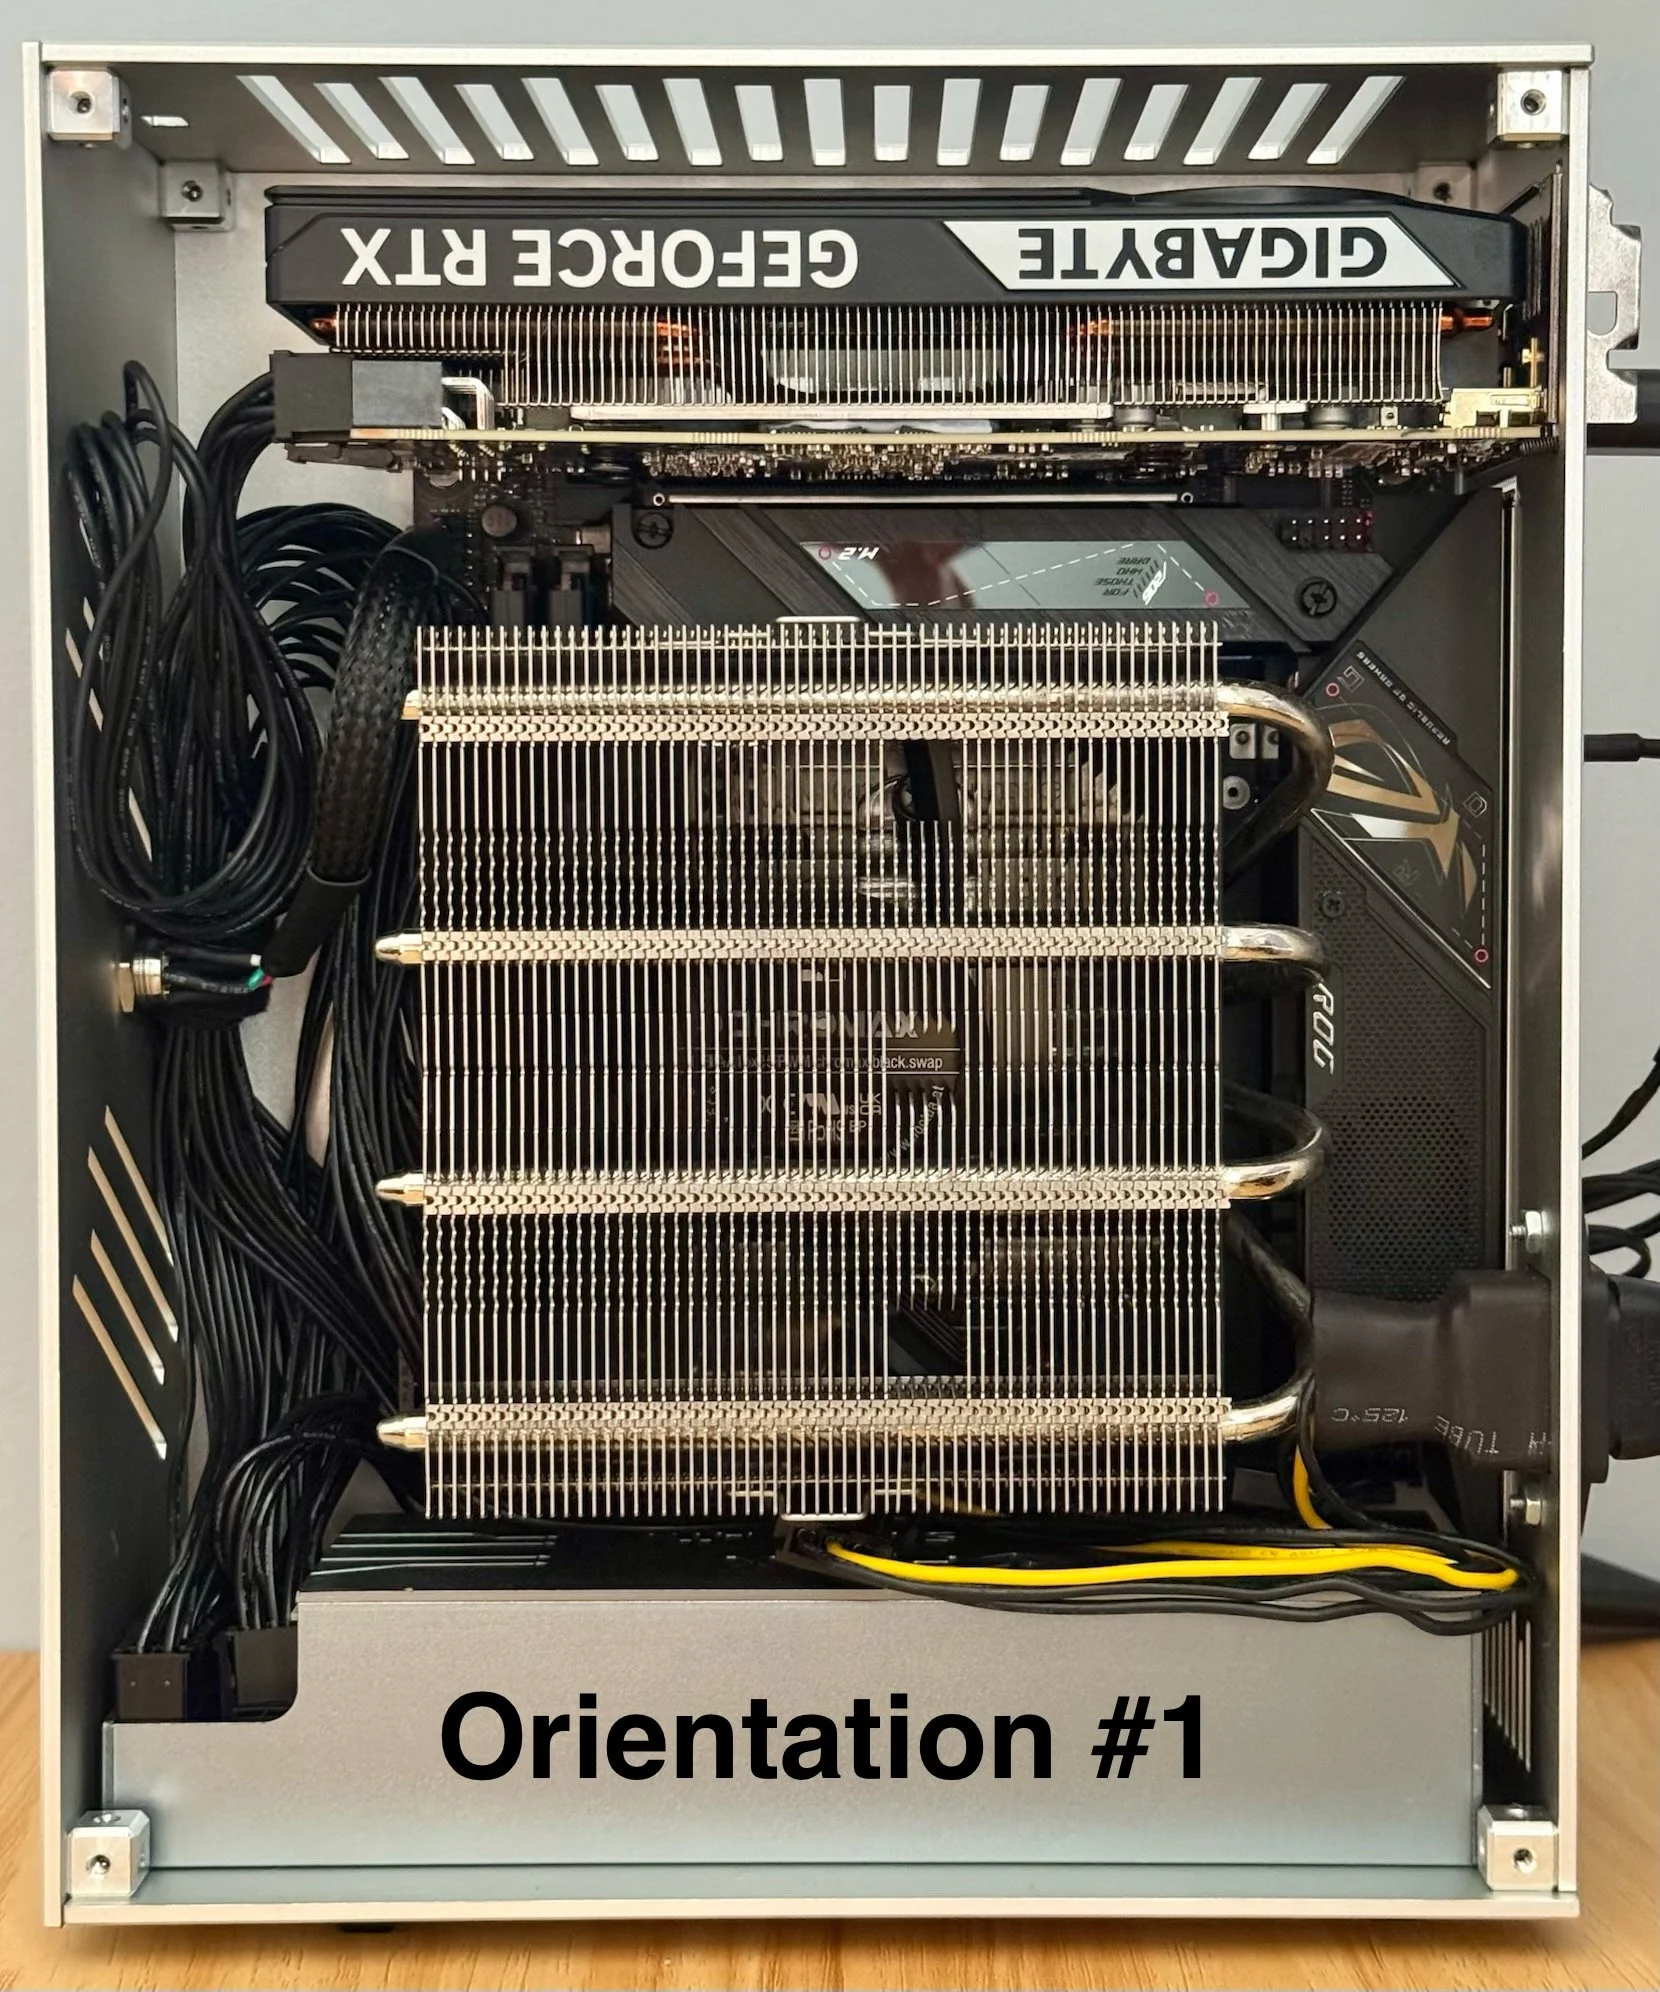
The Industrial supports both left and right orientations when looking from the front, allowing you to choose whether the GPU sits on the top or bottom.
Our product images feature the right orientation, with the CPU exhaust vent on the right and the GPU positioned on top. We recommend this layout for optimal airflow, as it gives the GPU direct access to cool intake air.
If you prefer the GPU and motherboard rear-panel lettering to appear right-side up, the left orientation is equally supported. Switching between orientations is simple—just follow the instructions in the manual. Flipping the case and repositioning the included rubber feet is all it takes.
The integrated headset hanger is compatible with either orientation, so you don’t lose any functionality no matter how you set it up.